
After purchasing the Quality assurance add-on, users are automatically added to Zendesk Quality assurance (QA) when they are added to your Zendesk Support account.
Admins, Account Managers, and (workspace) Managers can then organize users within groups, add or remove them from specific workspaces, and define their permissions within the Zendesk QA account using the Users page.
This article contains the following topics:
- About the Users page in Zendesk QA
- Adding and removing users from workspaces
- Adding and removing users from groups
- Managing users’ Zendesk QA account permissions
Related articles:
About the Users page in Zendesk QA
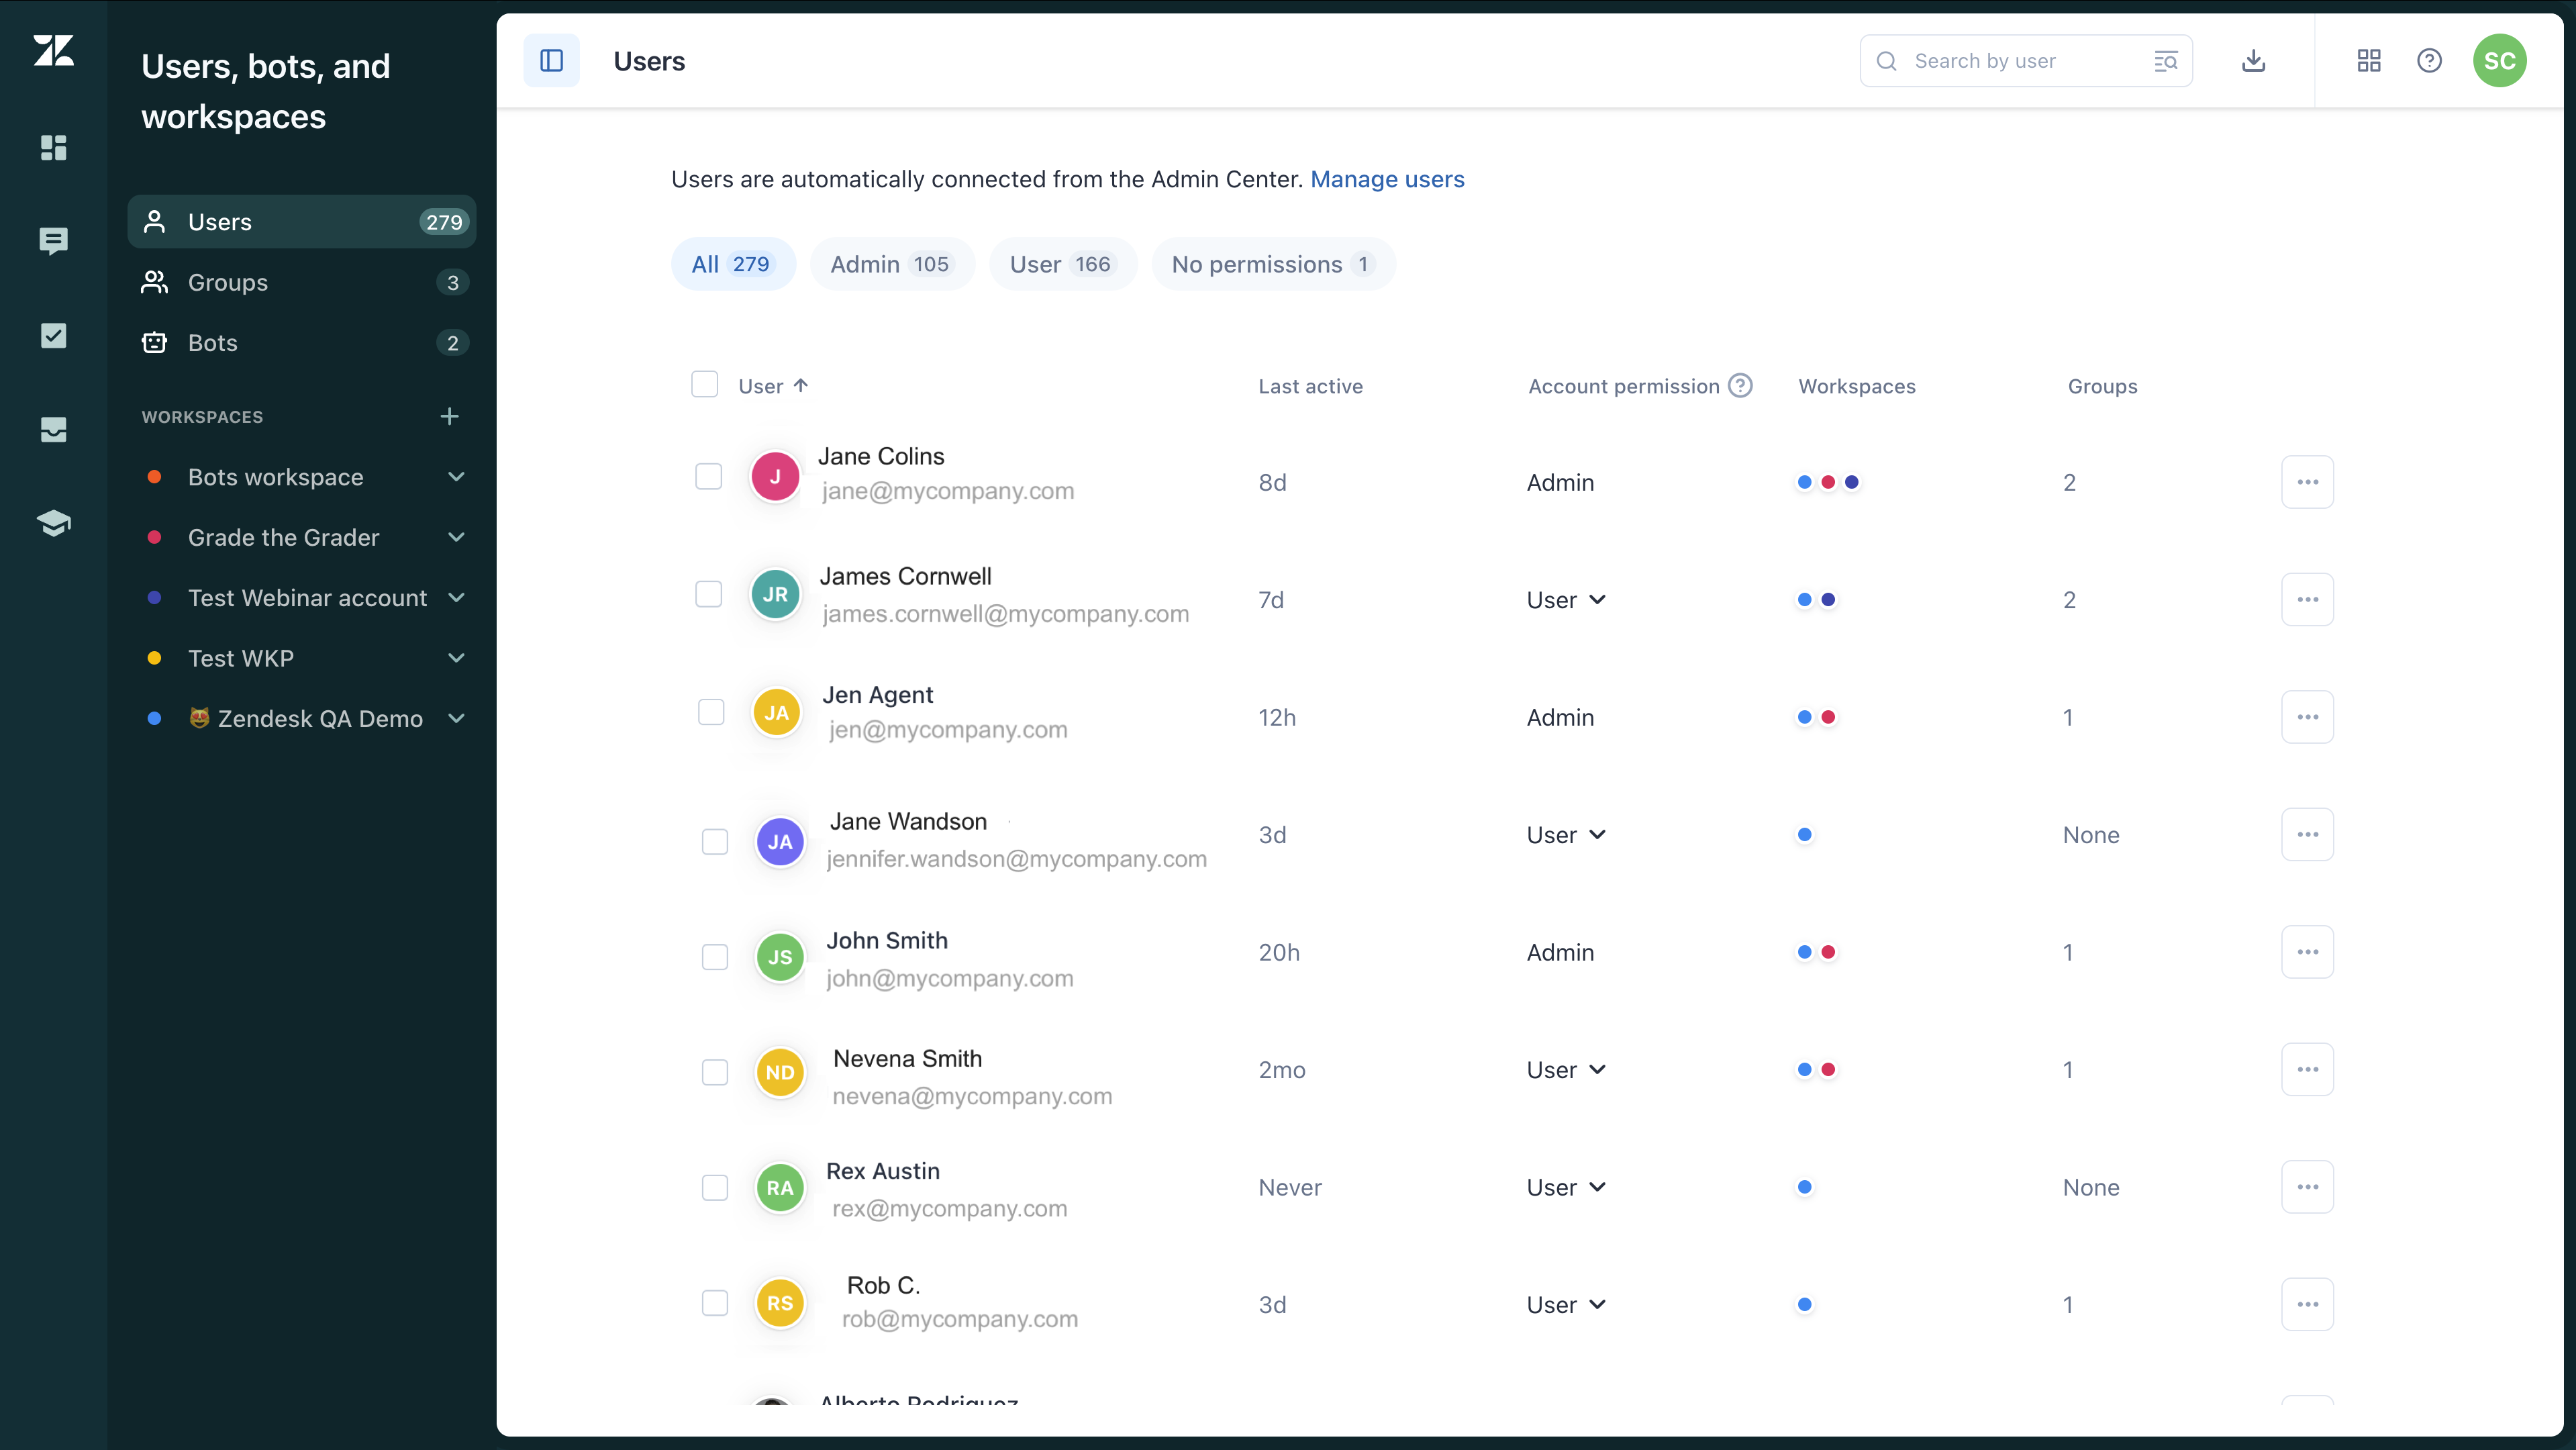
The Users page provides an at-a-glance view of how many users exist in your Zendesk QA account, their account permissions, the number of workspaces and groups they are assigned to, and when they were last active in their Zendesk QA account.
Admins and Account Managers can define users’ permissions within the Zendesk QA account using the Users page. Additionally, Admins, Account Managers, and (Workspace) Managers can organize users into groups and add or remove them from specific workspaces via the Users page.
To access the Users page in Zendesk QA
- In Quality Assurance, click your profile icon in the top-right corner.
- Select Users, bots, and workspaces.
- Click Users. Your list of users is displayed.
Adding and removing users from workspaces
Users can operate in different workspaces in Zendesk QA. You can review conversations based on the same criteria for all users or, if your business has different departments, such as Support, Sales, and Customer Success, for example, create multiple workspaces to separate these instances. See Deciding on one or multiple workspaces.
Users are assigned to the account default workspace when added to Zendesk QA.
Admins, Account Managers, and (Workspace) Managers can add or remove users from specific workspaces using the Users page or by accessing each workspace's Members list.
To add and remove users from workspaces using the Users page
- In Quality Assurance, click your profile icon in the top-right corner.
- Select Users, bots, and workspaces.
- Click Users. Your list of users is displayed.
- Select the users you want to edit.
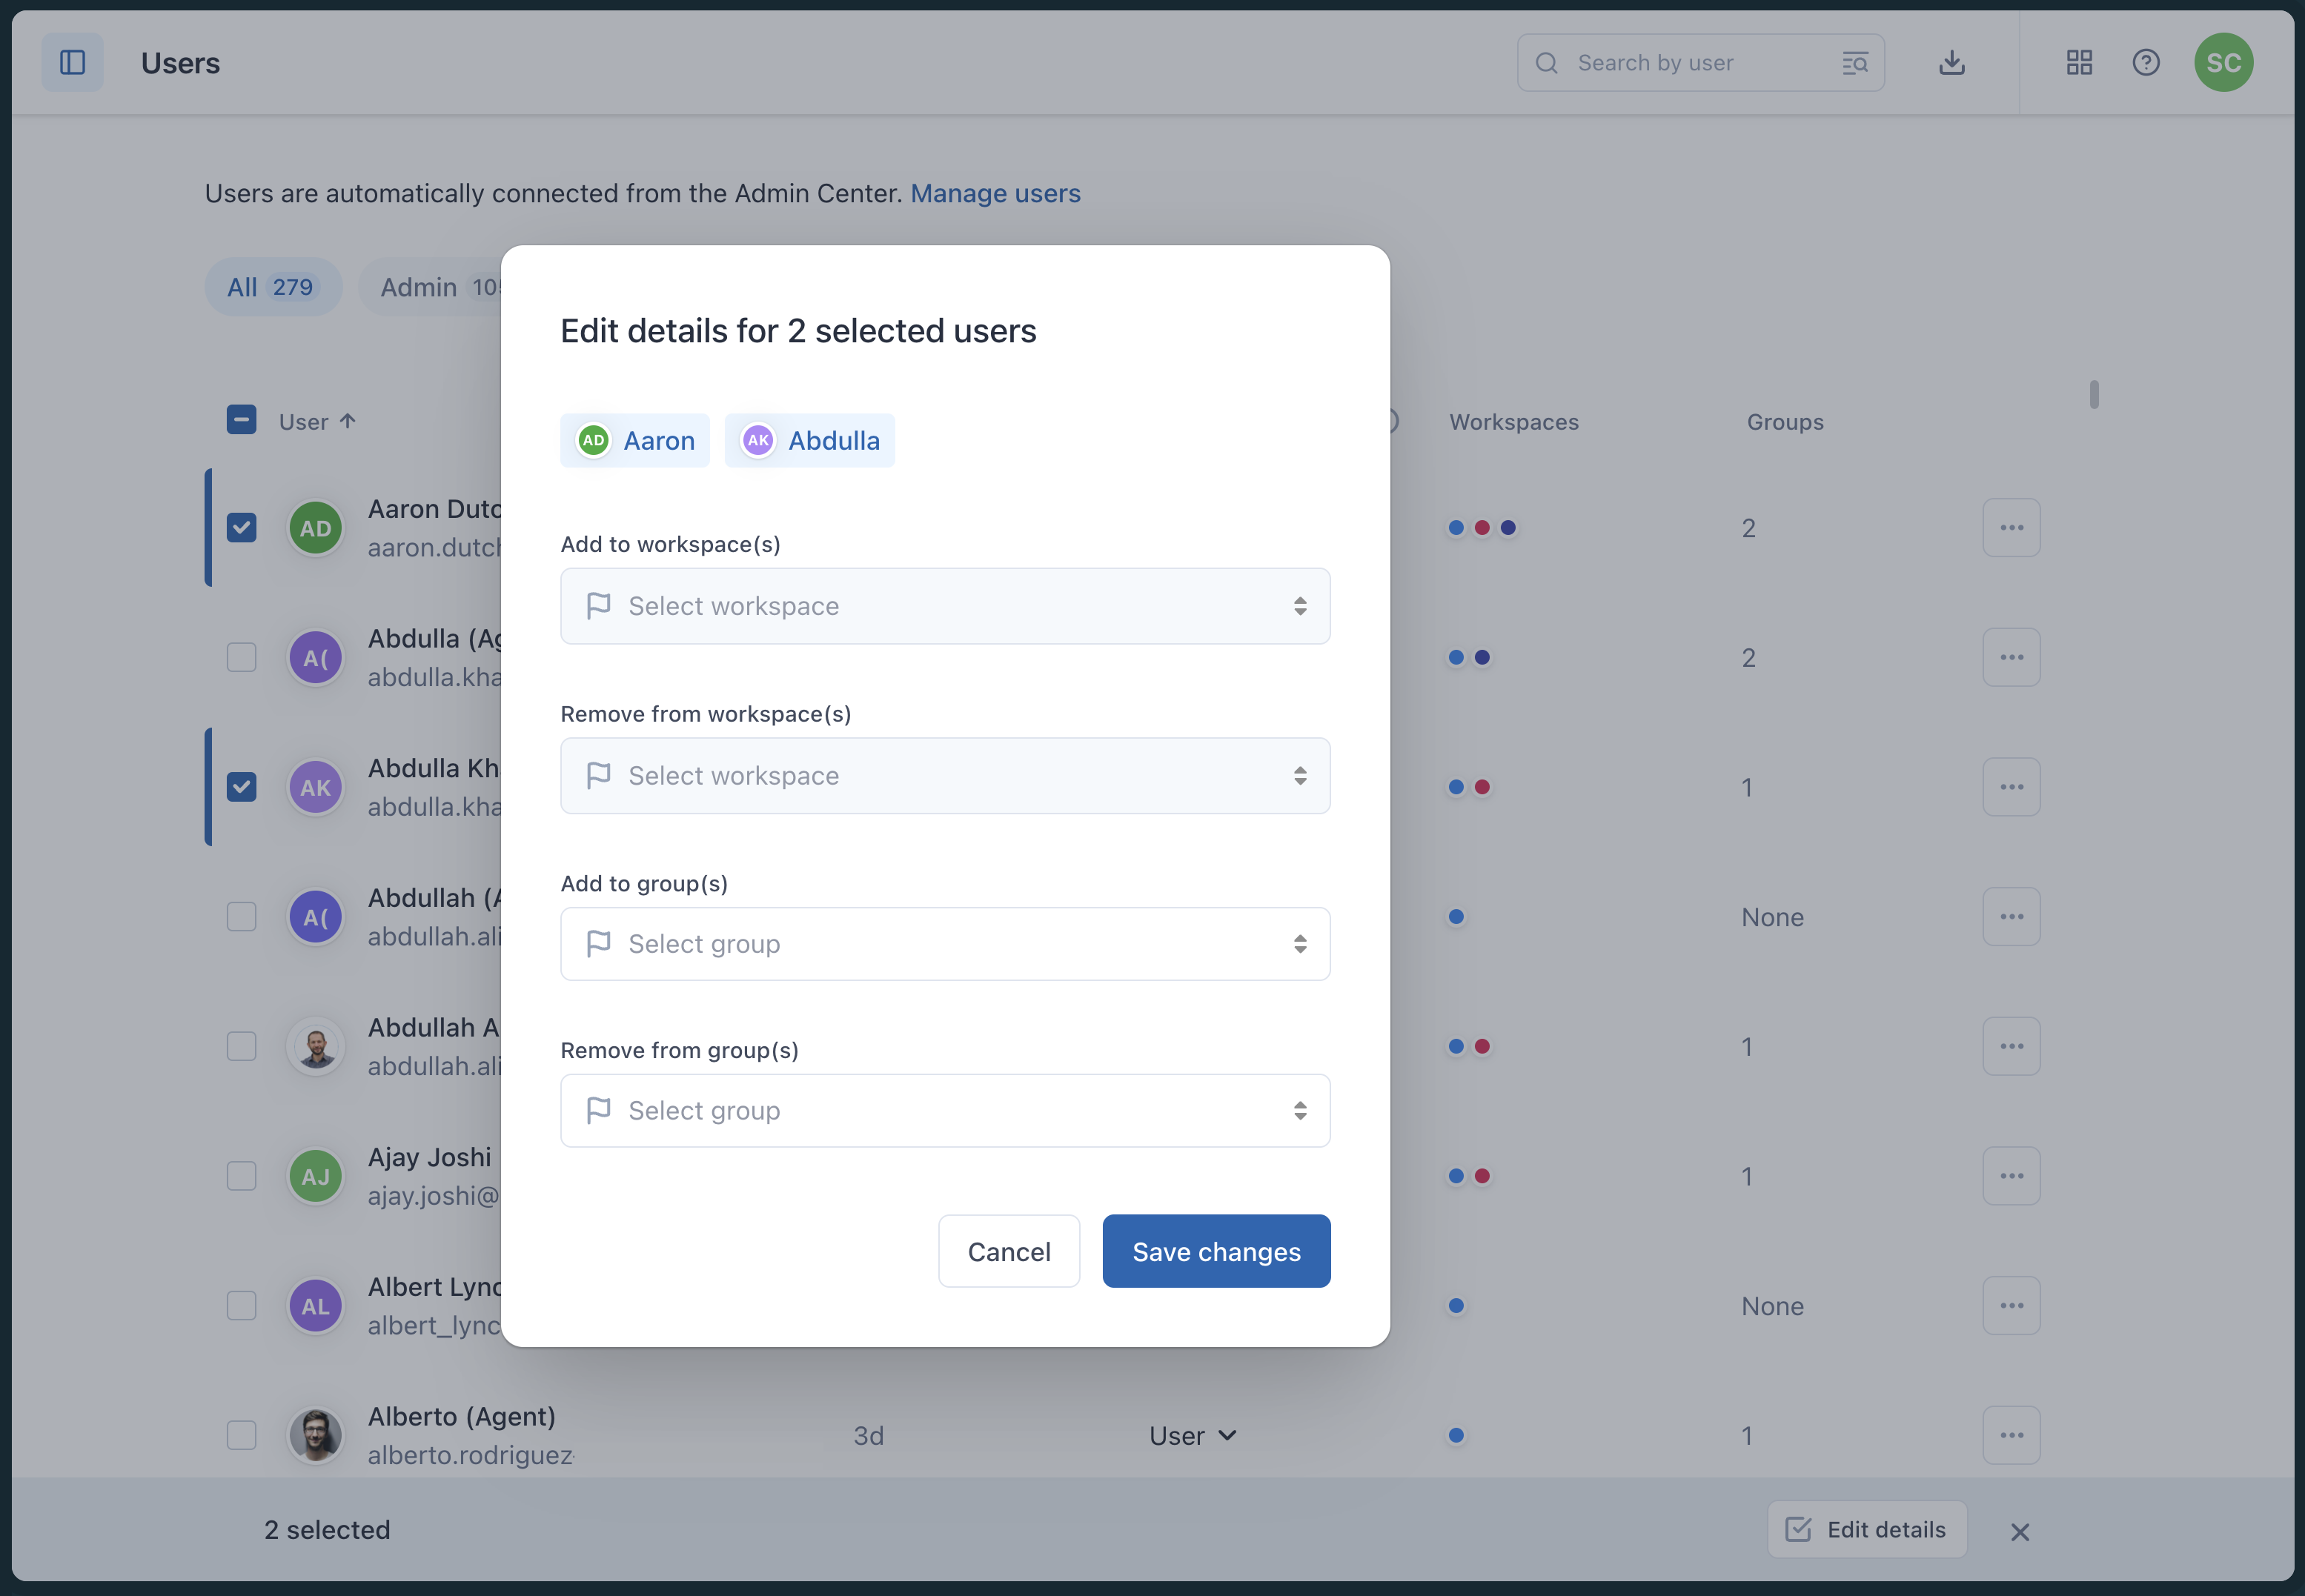
- A toolbar appears at the bottom of the list. Click Edit details.
- Select the workspaces where you want to add or remove users. Start typing the
workspace name to autocomplete or select an option from the drop-down
menu.
Click Save changes.
Adding and removing users from groups
You can also organize your users within groups, based on additional criteria, such as, organizational structure, language, or skill sets, for example. See Managing groups in Zendesk QA.
To add and remove users from groups
- In Quality Assurance, click your profile icon in the top-right corner.
- Select Users, bots, and workspaces.
- Click Users. Your list of users is displayed.
- Select the users you want to edit.
- A toolbar appears at the bottom of the list. Click Edit details.
- Select the groups where you want to add or remove users. Start typing the group
name to autocomplete or select an option from the drop-down menu.
Click Save changes.
Managing users’ Zendesk QA account permissions
Admins and Account Managers can define users’ permissions within the Zendesk QA account using the Users page.
To change a user’s Zendesk QA account permissions
- In Quality Assurance, click your profile icon in the top-right corner.
- Select Users, bots, and workspaces.
- Click Users. Your list of users is displayed.
- Click the role name under Account permission next to the user whose
permissions you want to change. An Account permissions pop-up window
appears.
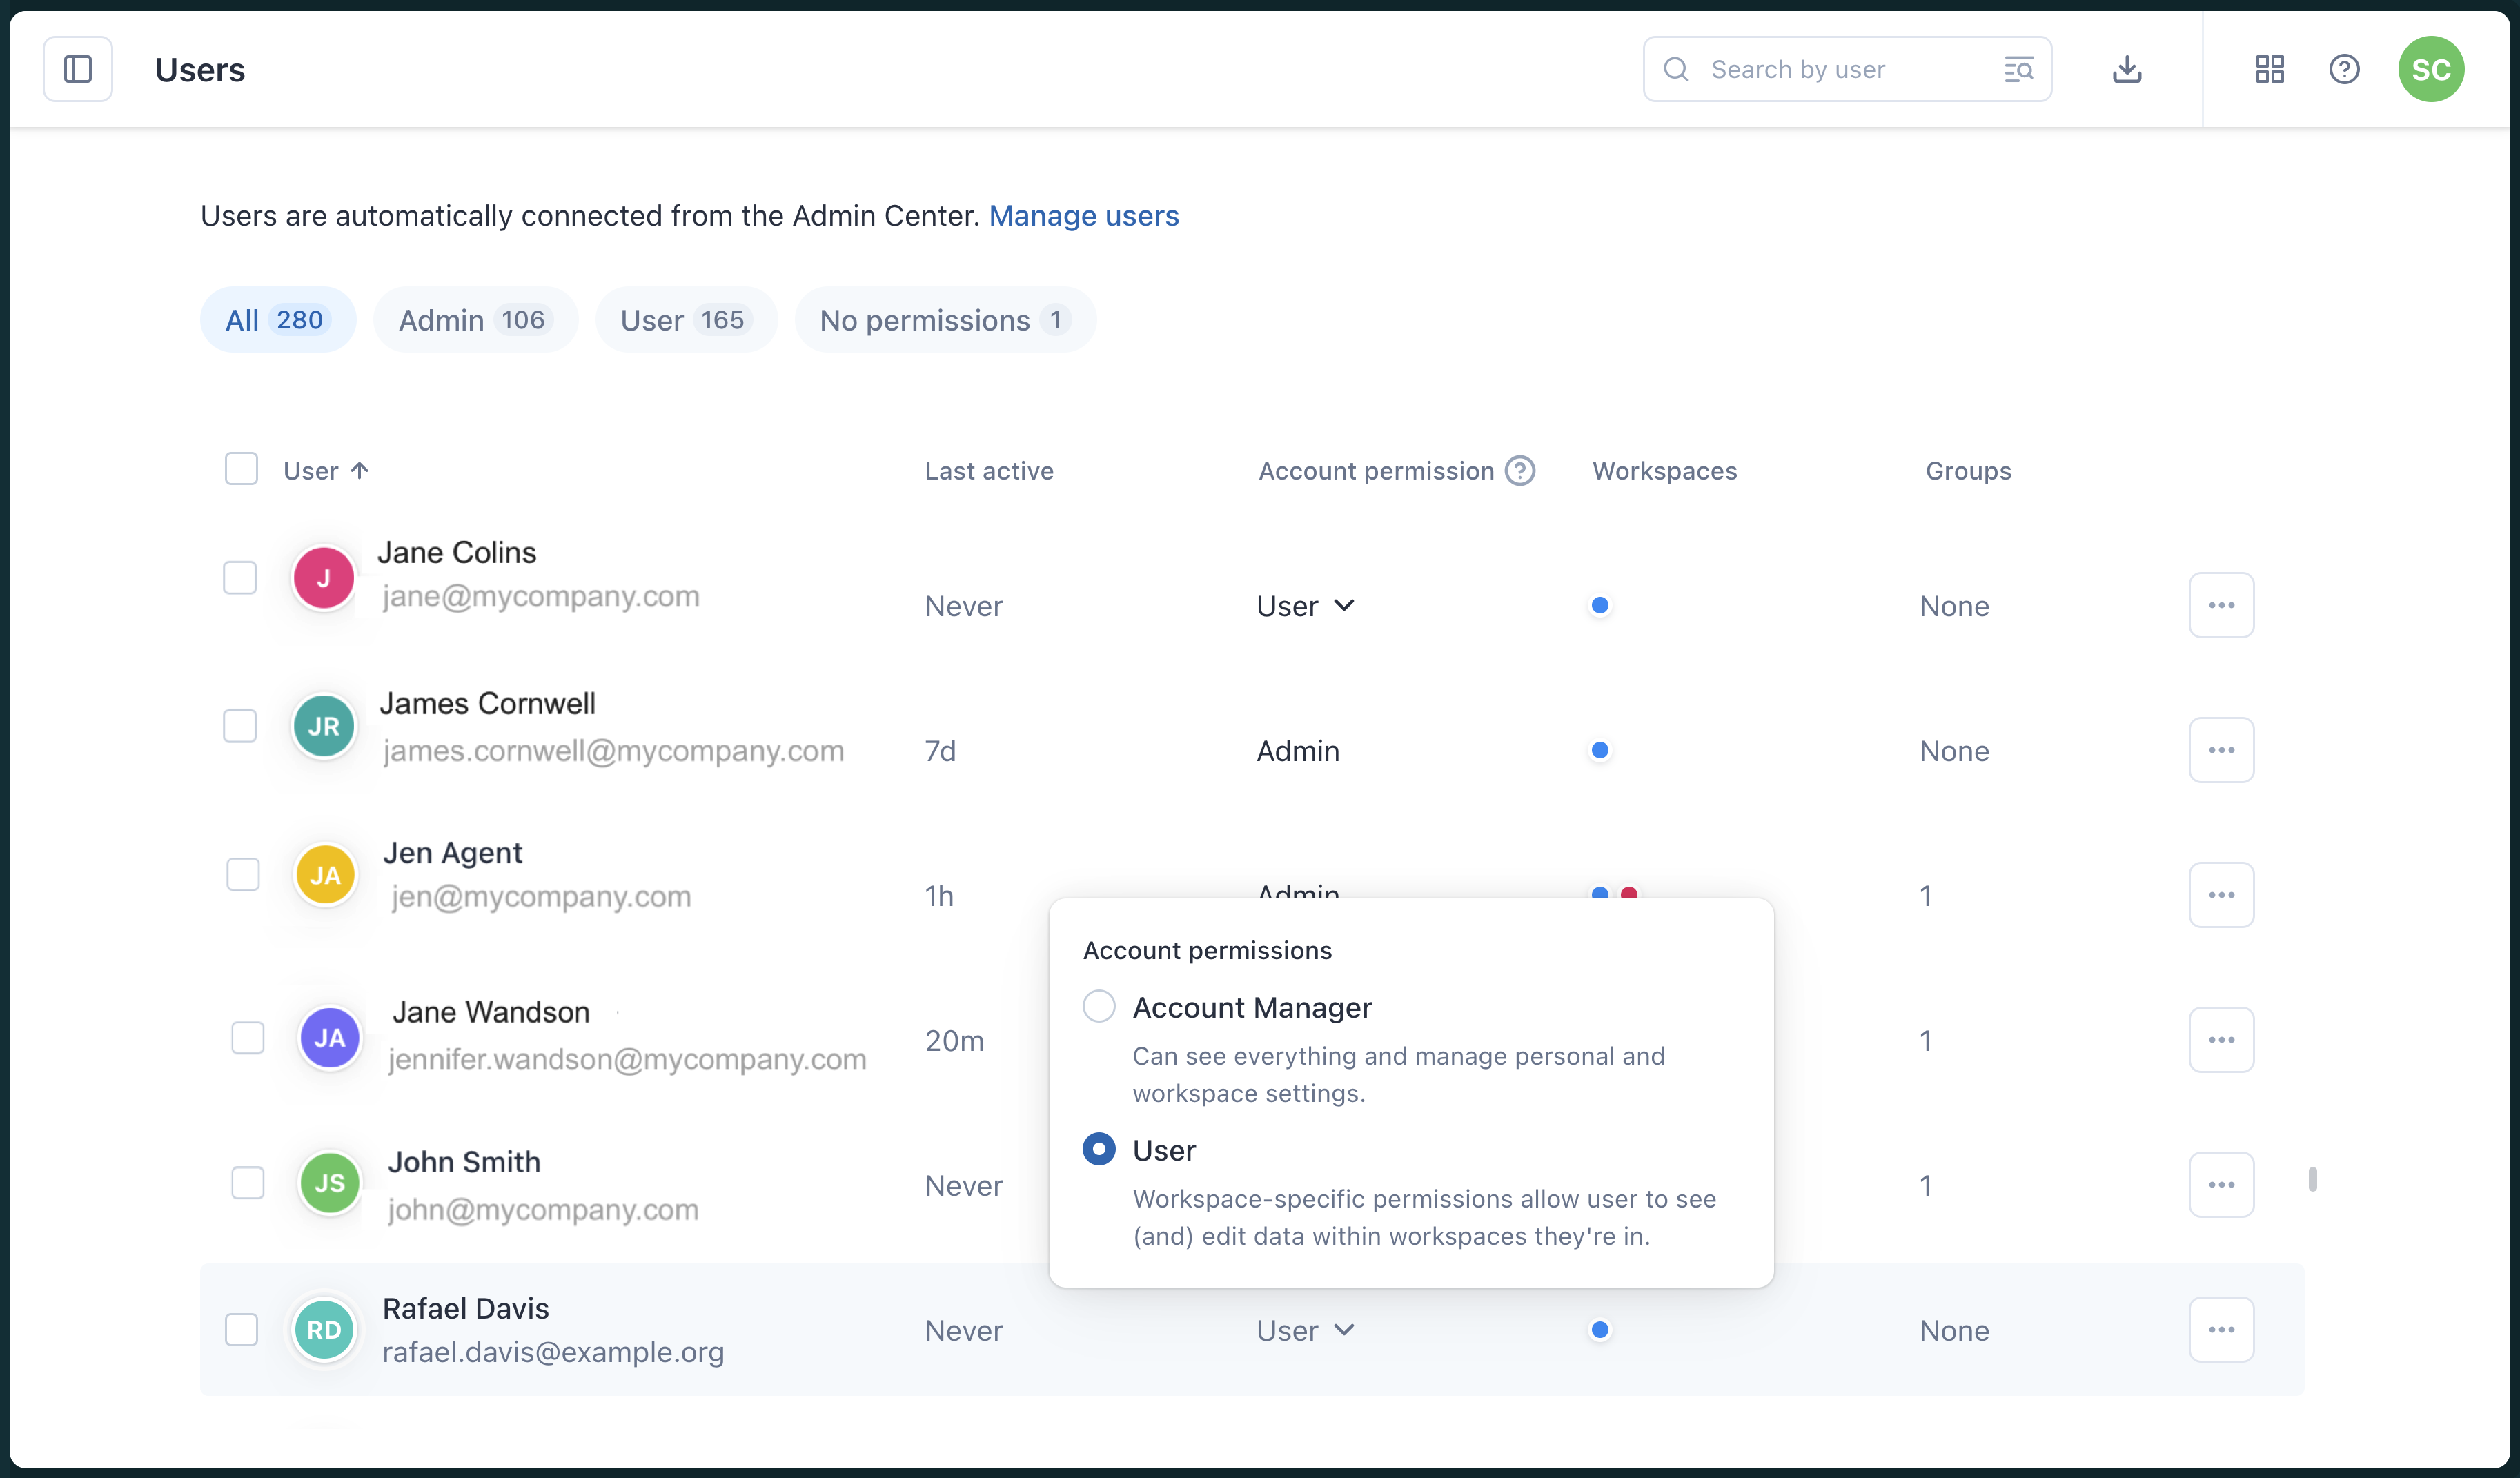
- Select the Account permissions for the user.Note: Changes are applied automatically, which may affect users’ access to certain parts of Zendesk QA. Learn more about roles and permissions in Zendesk QA.
0 comments
Please sign in to leave a comment.